Goodridge Brakeline Assembly
How do I assemble a Brakeline from Goodridge 600 series fittings?
Assembling Instructions for Goodridge 600 Series Brake & Clutch Hoses
Here at Merlin, we regularly assemble Goodridge brake and clutch hoses to customer specifications. But Goodridge’s range of 600 Series Re-usable fittings and hose can be assembled at home or in your own garage by using just a few simple tools. Here is our quick guide to assembling Goodridge 600 Series hoses.
Step 1
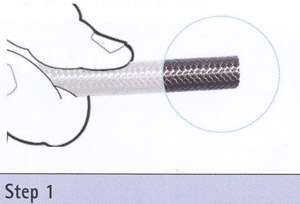
Using a fine tooth saw blade or cut off wheel, cut the PTFE lined hose to your required length. Clean any loose debris from both ends of the hose.
Step 2
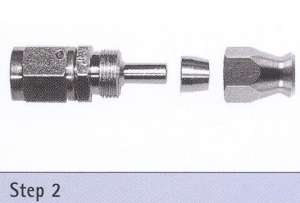
The Goodridge Re-usable fittings are made up of three parts. The main body, the brass olive, which is what compresses on to the hose when the fitting is assembled, and lastly the socket. On a clean, flat surface, disassemble the two fittings which are to be used.
Step 3
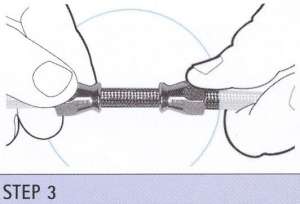
Push the two sockets, back to back, over the overbraid of the hose. You will notice that the braid on one end of the hose has flared out when cut, so work from the opposite end, this makes sliding the socket over the braid easier.
Step 4
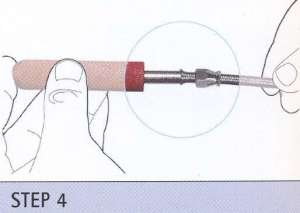
Using an appropriate sized Goodridge mandrel or small flat bladed screw driver, flare out both ends of the stainless steel overbraid from the PTFE inner liner.
Step 5
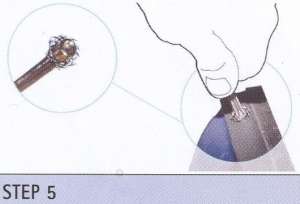
Push an olive onto each end of the PTFE inner tube by hand. The olive must sit over the PTFE tube but inside the flared out overbraid. Finish off by pushing against a flat, solid surface making sure the PTFE inner tube is fully home in the brass olive.
Step 6
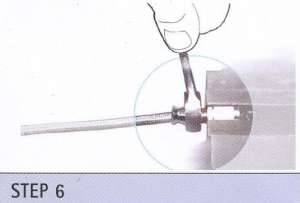
Hold the main body of the fitting in a ‘soft jaw’ vice and lubricate the male thread which accepts the socket. Push the hose over the nipple end and start to thread the socket over the lubricated male thread.
Step 7
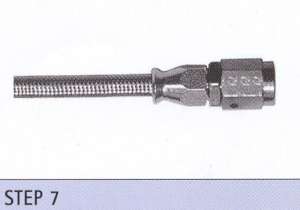
Finish tightening the socket on to the main body using a good quality suitably sized spanner. Tighten up until the socket is a ‘thumb nail’ gap from the hex of the main body.
Repeat steps 6 and 7 for the opposite end of the hose. Then you have finished. Important to note: under no circumstances should the socket be loosened from the main body in an attempt to adjust alignment.