This guide is designed to help you put together the popular range of Aeroquip Push-Fit (Socketless) FC332 or FC598 hose and associated hose unions. The assembly process is the same for either hose and for any of the unions we sell along side it.
This hose and its associated fittings do not require crimping nor do they require any form of hose clip or clamp. The large barbs on the union create a strong grip on the inside of the hose and due to the unions being over sized means they are incredibly difficult to remove from the hose so much in fact they have to be cut out! Maximum operating pressure of this hose is 300 Psi but we recommend staying well below this.
This hose and union combination is a proven favourite of lots of our customers for several reasons. It is cost effective, strong, robust and can be assembled at home in your shed with no need for special tools or machines, this allows for hose routing to be determined, manufactured and plumbed with the car in front of you.
Click here to see AEROQUIP FBN SOCKETLESS FUEL / OIL HOSE
Click here to see AEROQUIP FIR TREE OIL UNIONS
PARTS & TOOLS LIST
• Hose (cut to desired length).
• Hose union(s).
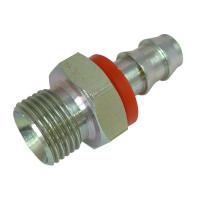
• Spare or used adaptor that has the correct thread for the hose union(s).
• Vice.
• Spanner of correct size to fit the hose union.
• Mug (preferably not your partners favourite mug!).
• Kettle

Part 1:
Place spare adaptor in the vice and tighten it up really tight (hence why we say use a spare or already used adaptor because it will get scuffed up and marked).
Screw hose union on to the adaptor and tighten up using spanner.
For 45 and 90 degree unions you may need to rotate the adaptor and union through 90 degrees in the vice to aid hose fitting.

Part 2:
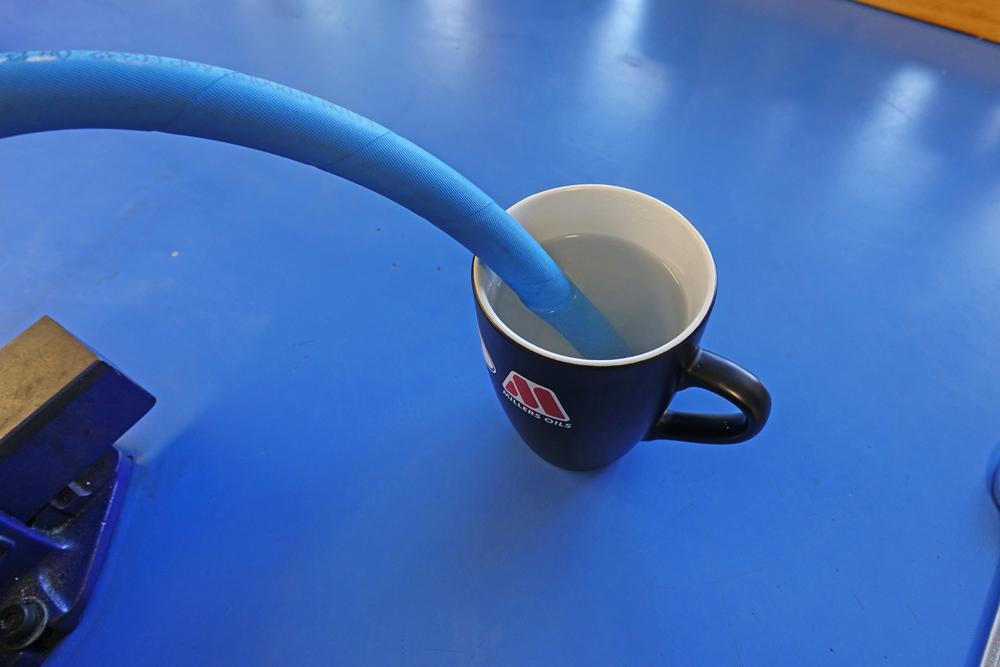
Boil some water in the kettle, pour water into the mug and leave the end of the hose in the hot water for 5-10 minutes. We would recommend leaving the hose in the water for a full 10 minutes in most cases as this makes the hose easier to push on to the union. Whilst waiting, put the kettle back on and make yourself a brew!
Part 3:
This is the tricky part! Using all the strength you can muster, push the hose onto the hose union. You may require some tissue paper or an old towel to wrap around the hose to stop your hand from scalding on the hot water. The trick here is to push and rotate the hose at the same time. *NB - You need to keep up the momentum and this movement as once you stop, it is near impossible to keep on pushing the hose on further. You will not be able to pull the hose off and try again. If you have to remove the hose, it will need to be cut off. At this point you realise why there are no clips or clamps required on this assembly! The hose needs to be pushed right up to the red plastic collar on the hose union.
Normally when assembling hose unions we would recommend a drop of oil to ease the hose on but you must not use oil on this assembly. The water will evaporate, oil will not and it would remain on the barbs of the hose union which may cause the hose to come off when the hose gets hot.

Part 4:
Stand back and admire your finished hose assembly (even if you are slightly out of breath from doing so). Allow any water to evaporate and the hose to cool down before fitting the hose assembly on to the vehicle and where possible, start engine/system and check for any leaks.

Please Note - this guide shows how to put together the popular range of Aeroquip Push-Fit (Socketless) FC332 or FC598 hose and associated Aeroquip hose unions. However, the assembly process is the same if using any of the Push-Fit unions we sell whether Aeroquip, Goodridge 536 series or our own Merlin Push-Fit unions.
We also supply -